In Dentiray Capture mounts, layouts, or templates are called Progressions. In order to create a new Progression in Dentiray Capture we must use the Progression Editor that comes with the Dentiray Capture software.
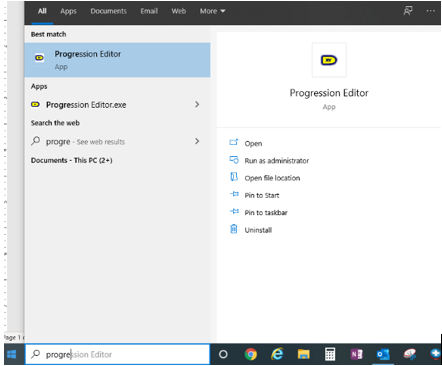
To open the Progression Editor, simply click on the Start button in the lower left hand corner of your desktop, and type the word Progression. After a few characters, Progression Editor should appear at the top of the list.
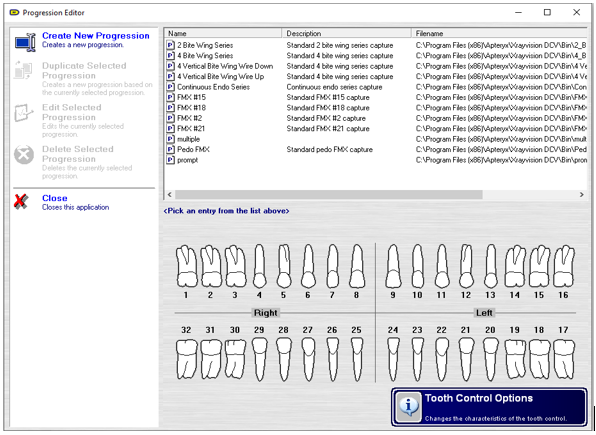
That will open the Progression Editor.
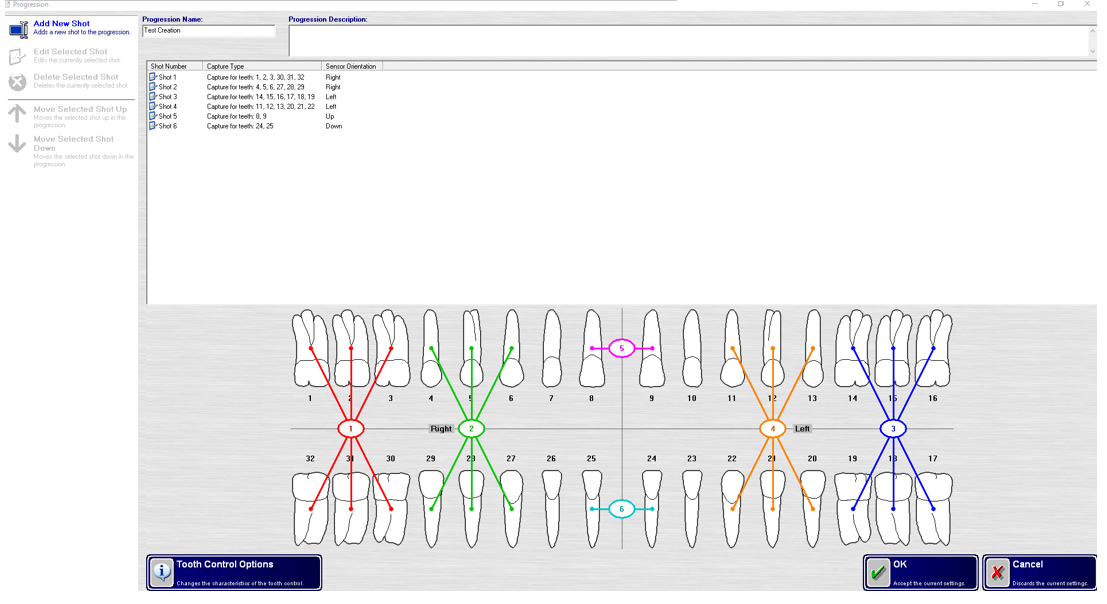
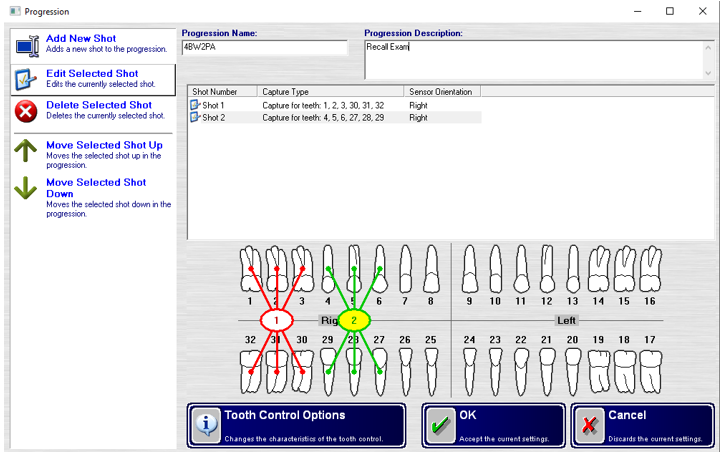
The first step to creating a new progression is to give it a name and if desired, a description.
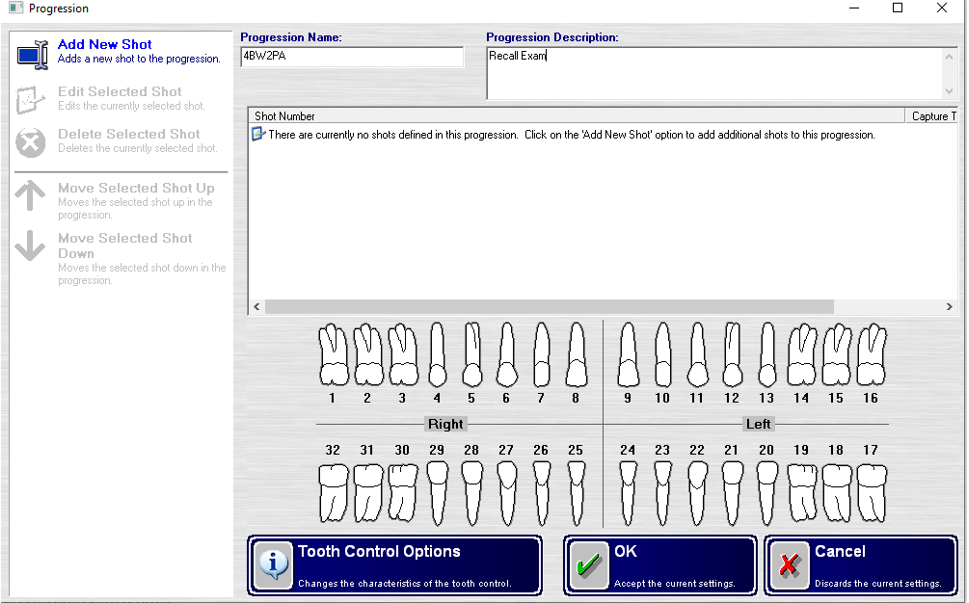
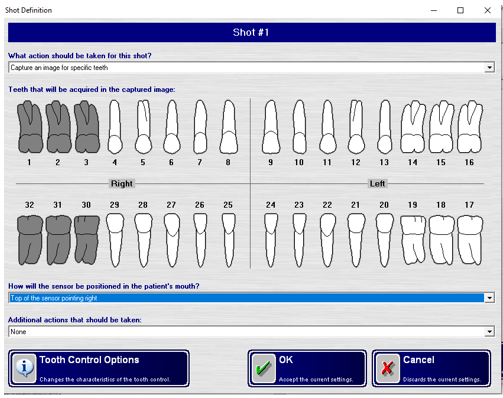
After naming your progression select Add New Shot. Then you will need to select which teeth are in the first x-ray taken for the new progression. You’ll also need to set the sensor orientation to match your shot. The sensor’s orientation is related to the patients right and left. If the image is for teeth on the patient’s right, the sensor needs to be set to “Top of the Sensor Pointing Right”. Then select OK.
.
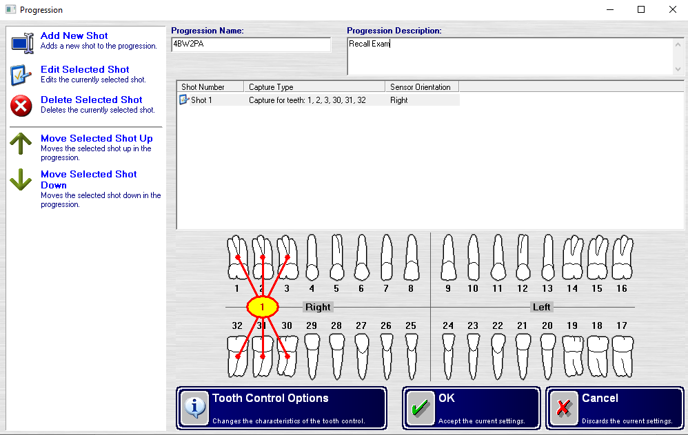
When you click OK to save that first shot, you can then add another shot. You should start seeing your progression taking shape as well.
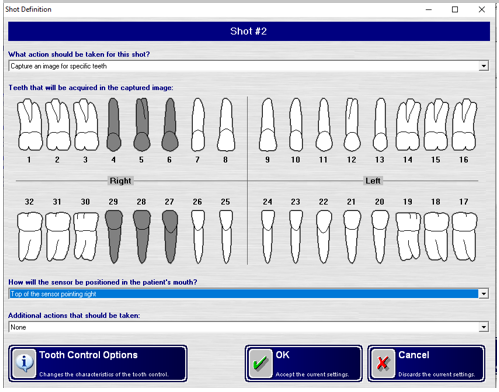
Repeat the steps to create your second shot, third shot, and so on.
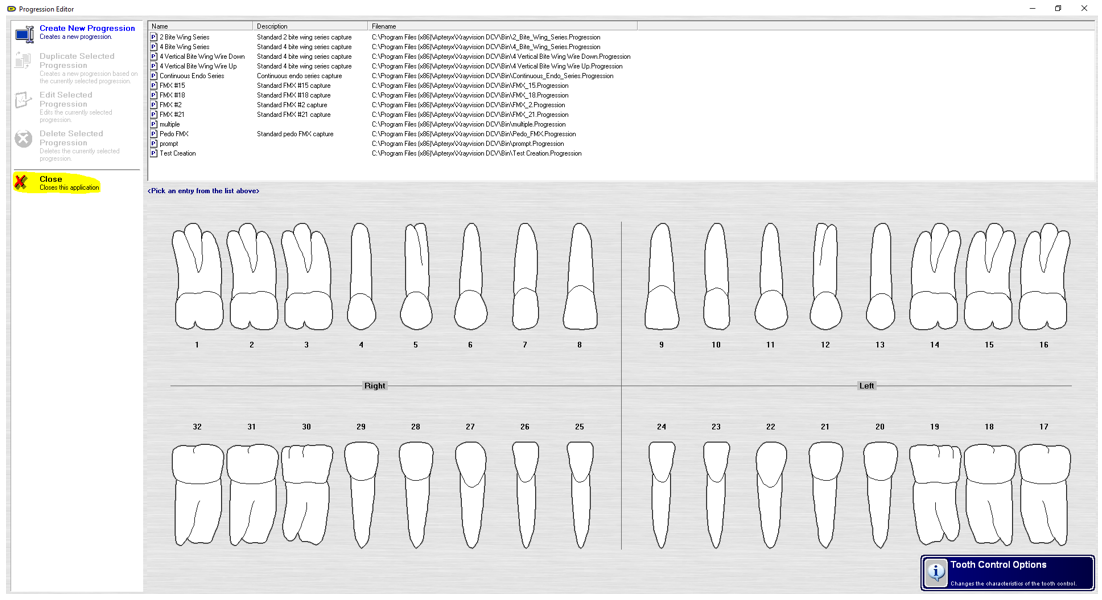
When you have recorded all of the shots for your progression simply click “OK” to save them. Then you will be brought back to the Progression Editor Progression main screen where you can start building a new one, edit an existing one, or simply exit if you are finished.